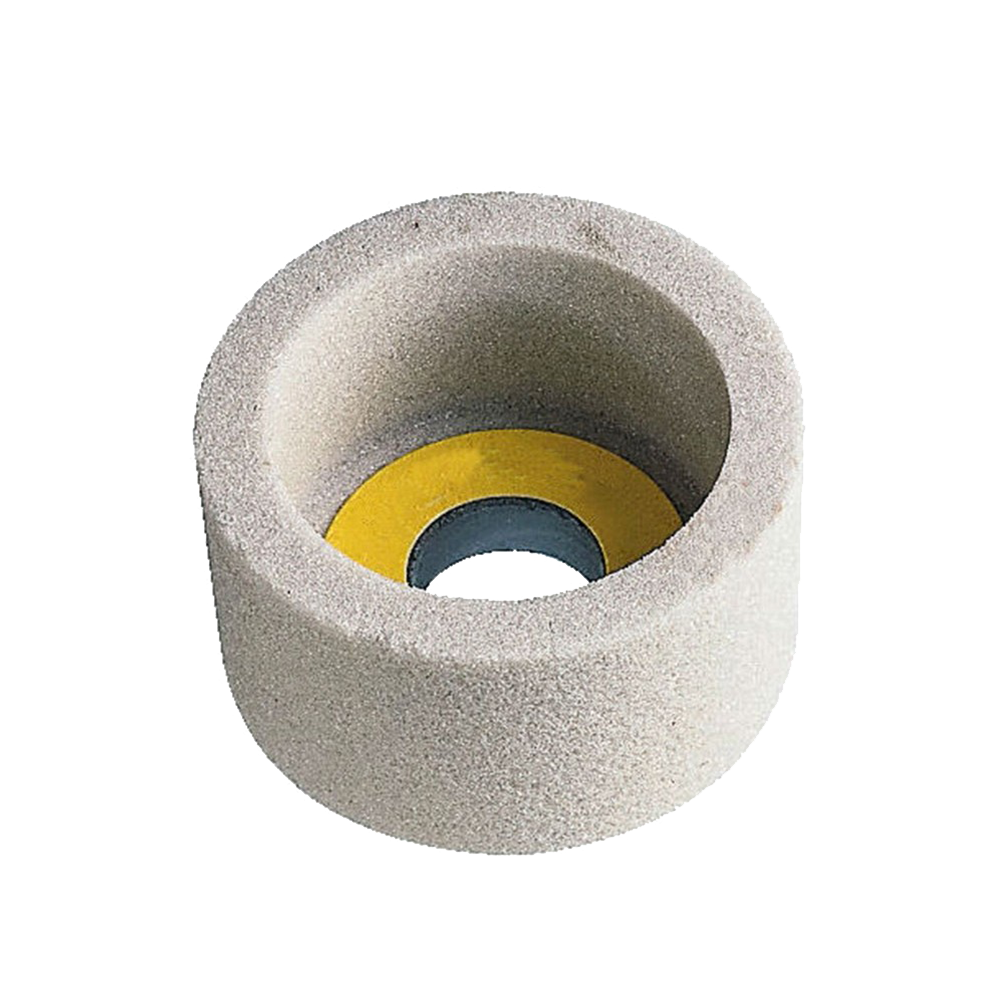
Face Grinding vs Peripheral Grinding — Why It Changes Everything
The shape of the wheel is not a styling choice. It decides which surface of your tool the abrasive can reach, and how true that surface comes out.
| Grinding mode | Wheel shape used | What it produces | Typical shape code |
|---|---|---|---|
| Face grinding | Cup / flaring cup | Flat faces — rake and flank faces of cutter teeth, saw tooth faces, serrated blade faces | 6A2 · 11A2 · 12A2 |
| Back-off / relief grinding | Cup, worked against a relief fixture | The clearance angle that sits behind the cutting edge | 11A2 + relief attachment |
| Peripheral grinding | Straight / flat wheel | Outside diameters, slots, flutes, edges | 1A1 · 1V1 |
| Form grinding | Profiled / dish wheel | A specific profile, radius or thread form reproduced in the tool | 4A2 · 12V9 · profiled |
Three consequences you can feel in the finished tool
- The ground face comes out flat. Full annular contact means the whole width of the tooth face is dressed at once. A peripheral wheel, contacting on a line, tends to leave a hollow or a hollow-plus-ridge face — which is why a badly sharpened saw blade cuts straight for a while and then starts to pull to one side.
- The wheel cannot foul the tool. The recessed centre of the cup is clearance. Without it, the wheel body and the arbor would collide with the cutter long before the diamond reached the cutting edge — you would have to stop grinding short of the edge, which is exactly where the sharpness lives.
- The setup is far stiffer. A cup wheel is supported across the whole back of its face rather than across a narrow rim, so it deflects less and repeats better. On a peripheral setup, deflection is what silently changes your edge angle from one cutter to the next.
Full Specifications
| Product | Cup Shape Diamond Grinding Wheels (face-grinding wheels) |
|---|---|
| Function | Face grinding and back-off grinding of hard-steel and carbide cutting tools; sharpening, re-profiling, form retention |
| Shape codes | 6A2 (dished cup) · 11A2 (flaring cup) · 12A2 (straight cup) · other profiles to drawing |
| Abrasive | Synthetic diamond (nickel-coated / SDC available for interrupted and heavy cuts) |
| Bond | Metal bond (standard — hardest, best form retention) · vitrified bond (coolest, free-cutting, preferred for finishing carbide) · resin bond. Ceramic/white-alumina and green silicon carbide versions also supplied for HSS and general tool room work. |
| Outside diameter (D) | 75, 100, 125, 150, 175, 200, 250, 300 mm |
| Wheel thickness (T) | 20, 25, 32, 40 mm |
| Bore (H) | 16, 20, 32, 40 mm · 12.7 mm (1/2″), 25.4 mm (1″), 31.75 mm (1-1/4″) on request |
| Diamond layer depth | 3, 5, 10, 15 mm |
| Rim / face width | 3, 5, 10, 15, 20 mm |
| Grit — D designation (FEPA) | D251, D181, D151, D126, D107, D91, D76, D64, D46, D35, D20, D15, D9, D6 |
| Grit — mesh equivalent | #60, #80, #100, #120, #150, #180, #240, #320, #400, #600, #800, #1500 |
| Grit class | Coarse (roughing) · Medium (general sharpening) · Fine (finish sharpening) · Super-fine (precision & PCD/PCBN) |
| Diamond concentration | 25 / 50 / 75 / 100 / 125 (≈1.1 – 5.5 ct/cm³) — 50 and 75 are the usual working grades |
| Maximum line speed | 35 m/s standard · 50–80 m/s on request |
| Recommended working speed | 20–35 m/s for tool and cutter grinding (see the speed table below) |
| Face runout after truing | ≤ 0.02 mm |
| Balance grade | G2.5 (fine-balanced for high-speed tool grinding) |
| Wheel core / body | Aluminium alloy (standard, lighter and cooler-running) · steel · bakelite on request |
| Mounting flange | Flange diameter ≥ 1/3 of wheel diameter; clean taper, evenly tightened |
| Coolant | Flood coolant strongly recommended — water-based emulsion or neat oil |
| Working condition | Wet grinding preferred for carbide; short dry passes only for conventional-abrasive wheels in general tool room work |
| Dressing | Silicon carbide or alumina dressing stick; light passes at low feed with coolant |
| Workpiece materials | Tungsten carbide (hardmetal) · hardened and tool steel · cermet · PCD / PCBN / CBN inserts · ceramic · glass · stone · hardfacing |
| Applications | Carbide end mills · reamers · drills · TCT circular saw teeth · serrated blades and sawtooth forms · hobs · broaches · drawing dies · form tools · planer and jointer knives |
| Machines | Tool and cutter grinder · universal tool grinder · surface grinder · CNC tool grinder · saw sharpening machine (with cup-wheel head) · back-off / relief grinding attachment |
| Customisation | Non-standard diameters, bores, layer depths, rim widths, profiles, grits and concentrations to drawing or sample |
| HS code | 6804.21 (millstones, grinding wheels and the like, of agglomerated synthetic diamond) — confirm with your customs broker |
| MOQ | 10 pcs (standard sizes) · 30 pcs where a new mould is required |
| Price | US$25 – 160 / pc depending on diameter, bond, grit and layer depth |
Choosing the Grit — What You Are Actually Buying
Grit is quoted two ways in this trade: the D designation (FEPA, measured in micrometres) and the older mesh number. They run in opposite directions — a bigger D number is a coarser grain. Buyers who order by mesh and then read a D-numbered quote are the reason most wrong-grit complaints happen.
Diamond grain size sets the surface finish you can produce, and therefore which stage of sharpening the wheel belongs to:
| Class | D designation | Mesh | Typical Ra | What it is for |
|---|---|---|---|---|
| Very coarse | D251 – D181 | #60 – #80 | Ra 1.6 – 3.2 µm | Roughing, removing chipped and damaged edges, re-profiling a badly worn tool |
| Coarse | D151 – D126 | #100 – #120 | Ra 0.8 – 1.6 µm | Rough sharpening, re-establishing the geometry of a tool |
| Medium | D107 – D91 | #150 – #180 | Ra 0.4 – 0.8 µm | General-purpose tool sharpening — the grade most workshops keep on hand |
| Fine | D76 – D64 | #240 – #320 | Ra 0.2 – 0.4 µm | Finish sharpening of carbide, cutting tools that will see coating |
| Very fine | D46 – D35 | #400 – #600 | Ra 0.1 – 0.2 µm | Precision finishing, PCD and PCBN inserts |
| Super-fine | D20 – D6 | #800 – #1500+ | Ra ≤ 0.1 µm | Super-finishing, mirror edges, optical and semiconductor tooling |
Concentration — the second lever
| Concentration | Diamond content | Use |
|---|---|---|
| 25 | ≈1.1 ct/cm³ | Light precision work, small contact areas, form grinding where the profile must not wash out |
| 50 | ≈2.2 ct/cm³ | General-purpose grinding — the sensible default |
| 75 | ≈3.3 ct/cm³ | Heavier stock removal, jobs where form retention and wheel life matter |
| 100 – 125 | ≈4.4 – 5.5 ct/cm³ | Maximum stock removal and the longest life; needs a rigid machine and adequate spindle power |
Higher concentration is not simply “better”. It costs more and demands more spindle power, but it spreads the grinding load across more grains, so each individual grain runs cooler and wears more slowly. On carbide — where heat is the thing that ruins the tool — that cooling effect is often the real reason to step up a grade.
Speed — Set It From the Diameter, Not From Habit
Diamond is rated by line speed (metres per second at the rim), not by spindle rpm. The same rpm that is correct for a Ø100 wheel is dangerously slow — and unproductive — on a Ø200 wheel. Use this conversion:
rpm = ( line speed in m/s × 60,000 ) ÷ ( π × wheel diameter in mm )
| Wheel Ø | @ 20 m/s | @ 25 m/s | @ 35 m/s |
|---|---|---|---|
| 75 mm | 5,090 rpm | 6,370 rpm | 8,910 rpm |
| 100 mm | 3,820 rpm | 4,775 rpm | 6,685 rpm |
| 125 mm | 3,055 rpm | 3,820 rpm | 5,350 rpm |
| 150 mm | 2,545 rpm | 3,185 rpm | 4,455 rpm |
| 175 mm | 2,180 rpm | 2,730 rpm | 3,820 rpm |
| 200 mm | 1,910 rpm | 2,385 rpm | 3,340 rpm |
Glazing, Burning and the Cobalt Trap
Almost every “this wheel is no good” complaint traces back to one of three things, and all three are diagnosable on the spot.
Glazing — the wheel is rubbing, not cutting
A metal-bond wheel holds its diamond grains very firmly. That is exactly what gives it its long life and its form retention — and it is also why, if the grains go blunt, the bond refuses to let them go. The face packs with swarf, turns glassy, and stops cutting.
- Signs: a reflective, glassy face · sparks that shrink and change colour · the workpiece getting hot while no material disappears · a burning smell · the wheel bouncing or chattering.
- Fix: dress the face with a silicon carbide or alumina dressing stick — several light passes at low feed with coolant flowing.
- Then find the cause: grinding metal bond dry · coolant that never reaches the contact zone · a wheel speed lower than you believe because a drive belt is slipping · or simply a bond too hard for the material.
Burning — the damage you cannot see
Carbide is a cobalt-cemented composite. Cobalt starts to soften somewhere around 800–1000 °C, and the surface layer micro-cracks under thermal shock. A burnt tool looks fine coming off the machine and then chips early in service, and the operator gets blamed for it.
The rule is simple: if you can see colour, you have already destroyed the surface layer. Straw or blue discolouration, bright orange-white sparks, steam off the coolant or a hard ringing note all mean stop, dress the wheel, restore the coolant flow and reduce the depth per pass.
The cobalt trap
Water-based coolant leaches cobalt out of the surface layer of carbide, leaving a weak, cobalt-poor skin that will not hold an edge. The professional answer is not to avoid water — it is to leave a small finishing allowance and grind it off in a light spark-out pass with fresh coolant, rather than doing all your stock removal and your finishing in one heavy pass. Tools ground that way hold their edge noticeably longer.
Sharpening Sequence
- Check the wheel before you check the tool. Look at the face for glazing and flat spots, and check runout. A wheel that is not square makes every cutter you grind wrong, and you will spend an hour adjusting a fixture that was never the problem.
- Mount it properly. Clean taper, flange at least one third of the wheel diameter, tightened evenly and progressively. An overhanging or unevenly clamped wheel will not run true at any speed.
- Set the speed from the table above, using the wheel’s actual diameter. Do not run a large cup wheel at the rpm you used for a small one.
- True the face, then re-check. Dress with a dressing stick, wipe down, and indicate the face. Aim for 0.02 mm or better.
- Set the angle — both angles. On a cup wheel the wheel-head angle and the fixture angle together decide the rake or flank angle of the tool. Set both deliberately, then lock them.
- Flood the coolant before the wheel touches the work, not after. Starting dry and catching up is how edges get burnt.
- Grind in several light passes. Let the wheel spark out at the end of each pass instead of pushing through it. If you are chasing time, raise the feed — not the depth.
- Inspect, then hone. Check the edge under magnification for chipping, then give it a light brush or hone. A slightly honed carbide edge outlasts a mirror edge in almost every real cutting application.
Selection Guide
By workpiece material
| Workpiece | Wheel to use | Typical grit |
|---|---|---|
| Tungsten carbide (hardmetal) | Diamond — vitrified bond for finishing, metal bond for roughing and form work | D126–D91 general · D64–D46 finish |
| HSS, M2 / M35 / M42 | Not diamond — use CBN or white alumina. Diamond is chemically unsuitable for steel and breaks down early. | CBN: B126–B91 |
| Hardened steel above ≈55 HRC | CBN (vitrified or resin bond) | B126–B76 |
| PCD / PCBN / CBN inserts | Diamond, vitrified or resin bond, rigid machine | D20–D6 |
| Cermet and ceramic | Diamond, fine grit, generous coolant | D64–D20 |
| TCT saw teeth and serrated blades | Diamond cup wheel with a relief / back-off fixture | D151–D91 |
| Stone, glass, ceramic tile | Diamond, coarser grit, metal bond | D251–D126 |
Working in steel or HSS rather than carbide? The wheel you want is on our Resin Bonded CBN Grinding Wheels page — diamond and steel are a bad combination, and CBN is the correct answer.
By job
| Your job | Shape | Bond | Grit |
|---|---|---|---|
| General cutter sharpening (shop default) | 6A2 | Vitrified | D107–D91 |
| Heavy re-profiling, chipped edges | 12A2 | Metal | D181–D151 |
| TCT saw tooth faces and back-off | 11A2 | Metal or vitrified | D151–D91 |
| Finish sharpening before coating | 6A2 | Vitrified or resin | D76–D46 |
| PCD / PCBN insert grinding | 6A2 or 11A2 | Vitrified or resin | D20–D6 |
| Form grinding to a profile | Profiled / 4A2 | Metal (form retention) | D126–D64 |
Applications
- Sharpening carbide end mills, slot drills and ball nose cutters — rake and flank faces, plus the end teeth.
- Reamers, drills and step drills — re-establishing diameter and clearance angles after wear.
- TCT circular saw blade teeth — face sharpening and back-off on a saw sharpening machine.
- Serrated blades and sawtooth forms — restoring the tooth profile without losing the set geometry.
- Hobs, broaches and form tools — where the profile must be reproduced, not approximated.
- Drawing dies and punches — finishing bores and faces in hardened tool steel with CBN.
- PCD, PCBN and CBN inserts — fine grit grinding on a rigid tool grinder.
- Planer and jointer knives, chipper knives and shear blades — long flat cutting edges.
Related grinding and cutting tools: Flat Shape Resin Bond Diamond Grinding Wheels, Resin Bonded CBN Grinding Wheels, T Segment Grinding Cup Wheels (concrete and stone), Diamond Grinding Plates.
OEM & Wholesale
GUSHI supplies cup-shaped diamond grinding wheels to tool rooms, saw service workshops, cutting tool manufacturers and tool distributors worldwide. We build standard sizes from stock and make to order for custom diameters, bores, layer depths, rim widths, profiles, grits, concentrations and bond types. OEM/ODM and private label are welcome, and we can mark wheels with your own branding and specification. Samples are available for testing; the sample fee is returned against your first official order.
Not sure which shape, bond or grit you need? Send us the tool you are sharpening and the fixture you grind it in, and we will recommend the wheel rather than just quote one.
Frequently Asked Questions
Why use a cup wheel instead of a flat wheel?
A cup wheel grinds on its face, a flat wheel grinds on its rim. Tool sharpening needs a flat face produced at an exact angle, and only face grinding delivers that: full annular contact means the tooth face is dressed flat across its whole width, and the recessed centre lets the wheel reach the cutting edge without the body or arbor colliding with the tool. Add the stiffness of a face-supported setup and you get repeatable edge angles rather than a hollow-ground face that pulls the saw to one side.
What do 6A2, 11A2 and 12A2 mean?
They are standard shape codes describing the cup profile, not the abrasive. 6A2 is a dished cup — deep recess, good clearance, the general-purpose choice for milling cutters, saw teeth and reamers. 11A2 is a flaring cup — the rim opens outwards so you can reach a tooth face with the tool held at an angle; it is the usual pick for back-off and relief grinding. 12A2 is a straight-sided cup with a wider flat annular face, good for larger flat faces and heavier stock removal. Tell us your tool and fixture and we will match it.
What grit do I need for carbide, and what about HSS?
For tungsten carbide, general sharpening sits around D126–D91 (#120–#180) and finish sharpening around D64–D46 (#240–#400). Coarser than D151 (#100) is roughing and re-profiling only; finer than D35 (#600) is for precision and PCD/PCBN work. Be careful with the two grit systems — a bigger D number is a coarser grain, but a bigger mesh number is a finer one. For HSS and hardened steel, use CBN or a conventional white alumina wheel: diamond is chemically unsuitable for grinding steel.
What diamond concentration do I need?
25 for light precision and form grinding, 50 as the general-purpose default, 75 for heavier stock removal and jobs where form retention matters, 100–125 for maximum removal and the longest life. Higher concentration spreads the load across more grains so each grain runs cooler — often the real reason to step up on carbide, where heat is what damages the tool.
My wheel has gone shiny and stopped cutting. What now?
That is glazing: the bond is holding blunt grains and the face has packed with swarf, so the wheel rubs instead of cutting. Signs are a glassy reflective face, sparks that shrink and change colour, a workpiece that heats up while no material disappears, and a burning smell. Dress the face with a silicon carbide or alumina dressing stick — several light passes at low feed with coolant running. Then check the cause: dry grinding on a metal bond, coolant not reaching the contact zone, a drive belt slipping so the wheel speed is lower than you think, or a bond that is too hard for the material.
Wet or dry — and can I grind carbide with water-based coolant?
Grind wet and flood it. Carbide is cobalt-cemented and cobalt softens around 800–1000 °C, while the surface layer micro-cracks under thermal shock — the tool then chips in service even though it looked fine off the machine. With water-based coolant, know about cobalt leaching: water pulls cobalt out of the surface layer and leaves a weak skin. Leave a small finishing allowance and grind it off in a light spark-out pass with fresh coolant rather than doing all the removal and the finishing in one heavy pass.
Do I need to true a new wheel, and what runout should I expect?
Yes, always check the face. Mount on a clean flange at least one third of the wheel diameter, tighten evenly, dress the face true, then indicate it — aim for 0.02 mm or better. This is not a formality. On a cup wheel, face squareness and runout are part of the geometry of every edge you grind, so a wheel that is out by a few hundredths grinds every cutter slightly wrong and no fixture setting can correct for it.
MOQ, lead time, OEM and samples?
MOQ is 10 pieces for standard sizes; custom shapes, diameters, bores, grits, concentrations and bonds are made to order, typically 30 pieces where a new mould is needed. Standard sizes ship in 5–10 days, custom in 15–30 days after deposit. OEM/ODM and private label are welcome, and samples are available with the sample fee returned against your first official order.